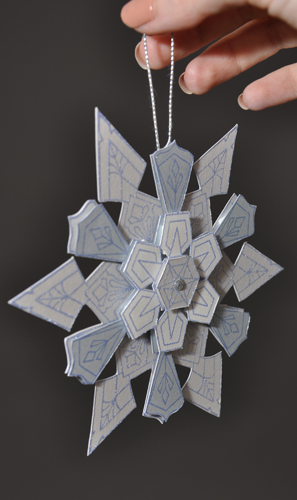
I've used them to decorate gifts, instead of a bow, used them as Christmas ornaments on a tree, and I've even matted and framed one for a wedding gift. They are pretty easy to make if you have a little imagination and access to paper crafting tools. The hardest piece to find is usually the medallion stamp. I haven't found them at my local craft or scrapbook store, but in a little mom and pop stamping and craft store. They can easily be found online though.
Tools Used
- Medallion Stamp
- Ink Pad (use pigment ink if also embossing)
- Embossing powder (optional)
- Embossing gun (optional)
- Scissors or exacto blade
- Baby wipes (cleaning ink off rubber stamps, do no use on clear stamps)
- Foam adhesive squares or "pop dots"
- Paper (cardstock weight works best, for the snowflake I used shimmery paper)
- Powder bag (optional)
- Cutting mat

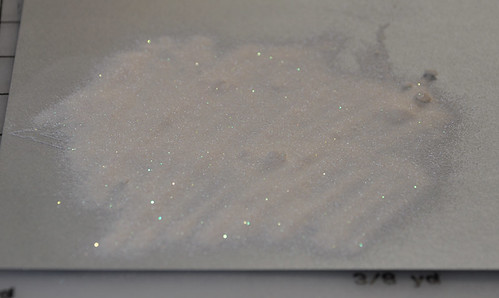
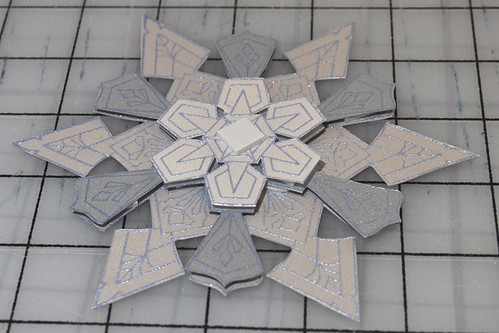
First step is to look at the medallion stamp and decide how many layers to include. I decided to do 4 layers, but I easily could have done more but it requires more cutting and stamping. I wipe the powder bag over the paper. This prevents the embossing powder from sticking to the paper by reducing the static. I ink my stamp and press the stamp evenly onto my first piece of paper. Immediately I cover the inked image with embossing powder. You can skip this step, but I like how embossing helps the lines to stand out. If you do emboss, you will need to use a watermark ink pad or a pigment ink pad so that the embossing powder sticks to it. Dye inks dry too fast.
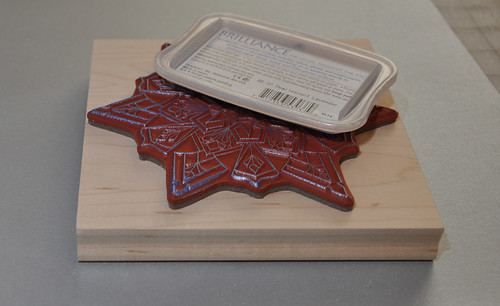
I tap off the excess powder onto a plain sheet of paper to save for later. I use the embossing gun to heat the paper and melt the powder. It's pretty fun to watch it change from a dull powder to a shiny liquid. Use caution as the gun gets pretty hot, like a hair dryer. If the powder gets too hot it will burn. Repeat these steps until you have all the layers you need.
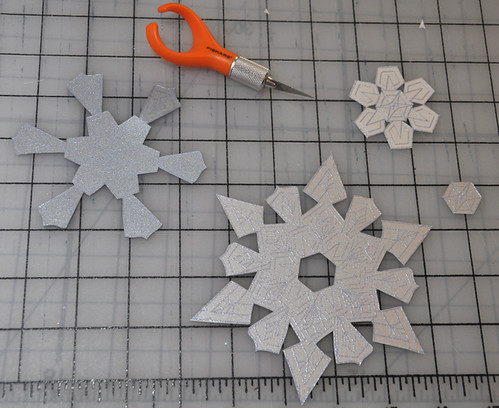
Carefully cut out each layer. I find an exacto blade is better to use because you can get pretty detailed in cutting. However many find small pointed scissors to be just as easy to use. On my snowflake, I decided to cut out my 4th layer from the bottom layer since the part was going to be covered up anyway.
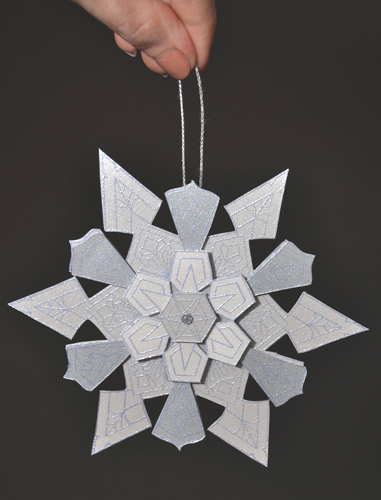
Use foam adhesive squares to adhere each layer together. This pops up the layers to make them look more 3D. If you know me, then you know I need to add some bling or glitter. Voila! You're done! If you decide to use it as an ornament you can also add layers to the back so it's not one sided.
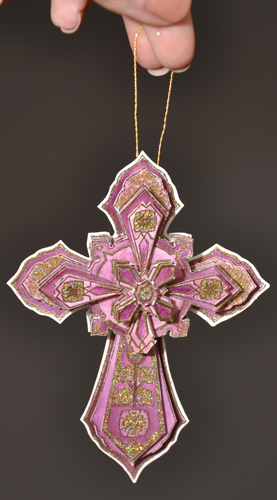
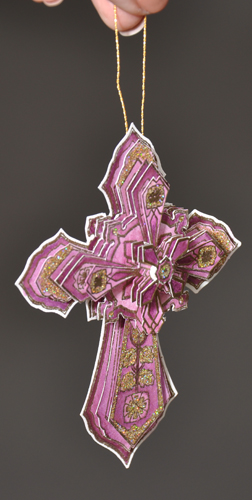
Cross was embossed in gold on white paper and then colored with watercolors but could also be colored with pencils, markers, etc, before being cut out.
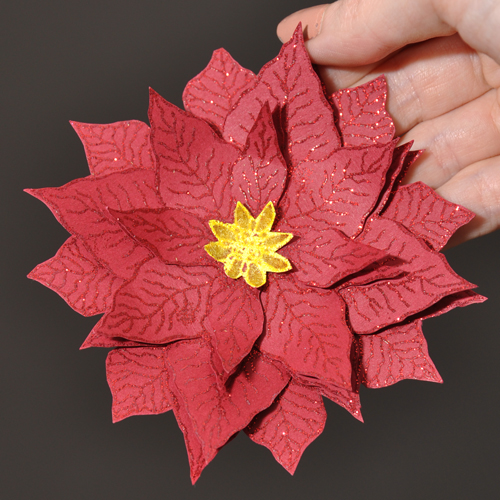
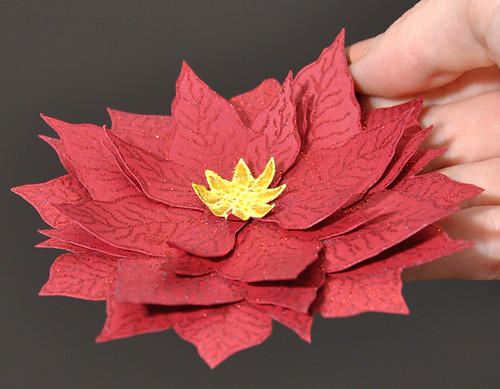
Poinsettia was embossed with red tinsel embossing powder, on red paper. Instead of using adhesive squares, I used permanent adhesive in the middle of each layer, but then curled up the leaves to make it more 3D. I used yellow flock in the middle.
Oh, and I forgot to mention that the snowflake only took about 30 minutes to make!
ReplyDelete